Roofing Services

If you’re looking for ways to grow your roofing business, try a referral program. Reward professionals such as home inspectors and real estate agents who send clients your way by offering them discounts, bonuses, or commission.

Roofing

The job responsibilities section is an important part of a roofer’s job description, as it helps attract suitable candidates while deterring unqualified jobseekers. Contact Roofing Services Kalispell Montana now!

A roofing service can install new roofs in residential and commercial buildings. They can also install insulation and other components to improve the energy efficiency of a building. They can help you choose the right type of materials for your roof, taking into account the climate and age of the building. This will ensure that your roof is durable and weather-resistant. It will also enhance the appearance of your home and add to its curb appeal.

Roofers can also inspect and repair existing roofs. They can replace worn out shingles and flashing, and can seal leaky joints and cracks with caulking. They can also install gutter systems and solar panels. In addition, they can perform chimney services and repairs and install skylights. They can even make minor adjustments to the interior of your house, such as moving light fixtures and vents.

In some cases, roofers may collaborate with other construction professionals on large projects. They can provide project assessments, coordinate schedules and work with teams to complete roofing tasks in a timely manner. They also have customer service skills, as they interact with clients to discuss their options and answer questions.

When you’re choosing a roofing contractor, ask about their experience and qualifications. Look for a company that has been in business for at least five years and has a good reputation in the community. Also, ask about their insurance coverage and whether it’s up to date. Ideally, the roofing company should have both general liability and workers’ compensation insurance.

If you’re planning to sell your house, a well-maintained roof can increase its value. It can also help prevent serious structural damage and maintain a safe living environment for you and your family. Roofing services can also install a range of other improvements to your property, such as siding and window installations. They can also install ice melt systems and other features to make your home more comfortable and energy efficient. They can even add decorative elements to enhance your home’s curb appeal. They can also help you choose the best materials for your roof and advise you on how to maintain it.

Repair

A well-maintained roof is a shield that protects everything and everyone inside your house. If the shield is damaged, it’s time to call a roofing contractor for repairs. If the damage is serious, the roofing company may also install new shingles. They will also clean up the debris and dispose of it properly.

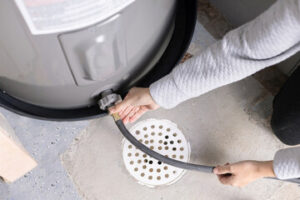
Most roof repair is done to re-seal areas where water might leak through. They will replace damaged flashing, patch cracks and replace or repair vent boots. They will also re-caulk around chimneys, skylights and other features. Surface repairs are also common, including replacing cracked or missing shingles and filling in small holes.

To do a proper job of roof repair, they will have to remove some shingles to get at the area that needs attention. They will then use a caulking gun to apply new sealant to the areas that need it. This will ensure that the roof is watertight and that no more leaks can occur.

The roofing contractors will be careful not to disturb the underlying sheathing, and they will not put too much pressure on the existing shingles. They will work quickly to minimize the amount of moisture that gets into your home.

When you have a leaking roof, it’s important to act fast. Waiting too long could lead to mold, mildew and structural damage in your home. It’s also possible that you will have to pay a higher insurance premium as a result of water damage.

Whether you are doing a diy roof repair or having the professionals do it, the best time to do it is during off-peak seasons. This will allow you to take advantage of lower pricing and more flexible contractor availability. It will also give you the best chance of having the job completed before bad weather hits.

If you are doing a diy roof repair, make sure that you have all the necessary tools before you start. The most important tool is a ladder, and you should always be working with an assistant. You will also need a good set of hand tools, such as a pry bar, shears and a nail puller. A good pair of rubber gloves will help you avoid slipping and cutting yourself.

Maintenance

Roofing maintenance can help avoid major problems in the future. A roof can be damaged by many factors, such as high winds, hail, or debris, and it is important to have a regular inspection to detect problems early. A professional roofing contractor will know what to look for and can repair any issues quickly. They can also offer preventative services to keep your roof in good condition for longer.

During maintenance visits, your roofer will inspect the entire roof structure for any damage or wear. They will clear all roof drains and gutters, and inspect for sagging or damage to roof trusses or supports. They will re-flash splits in field and wall flashing, and replace any loose gutters and leaders. They will also check and clean roof surfaces and attic vents. Chimneys, solar panels and skylights are areas that can cause leaks and should be examined for sealant failure or deterioration.

In addition to a roof inspection, your roofing contractor will make sure that all the attic insulation is in place and in good condition. Insufficient attic insulation can lead to Ice Dams in the winter and excessive heat in the summer. Your inspector should always go into the attic to check the insulation and should not hesitate to recommend additional insulation if necessary.

Your roofing contractor will provide you with a report after each maintenance visit and a list of recommended repairs. This will allow you to monitor the progress of your roof replacement project and plan accordingly. They will also notify you of any manufacture roof warranty requirements.

A good roofing contractor will have a roster of people that will be performing the maintenance and can run background checks on them. This will ensure that your building’s employees are safe on the property and that they are all trained in the type of repair that your building requires. All maintenance crew vehicles will be equipped to handle a variety of different repair types and will be briefed each morning on the buildings needs and systems that they will be working at.

Insulation

The proper amount of attic insulation in your home can dramatically lower your energy costs throughout the year as well as protect roof shingles from damage during harsh Albany, NY winters. Our experienced team of residential home energy professionals will perform a no-cost energy assessment of your home to identify areas that require insulation services and provide service advice, as well as a price quote.

Choosing a reputable roofing contractor to perform your roof repair or replacement is one of the most important decisions you can make for your family’s safety and comfort. A good roofing contractor should have a solid history of safe and quality work, and be licensed and insured to perform the services they offer. Homeowners should always demand written estimates from a roofing company before they sign any contracts or give payment.

There are many different resources available to help prevent falls in the roofing industry including fall prevention plans,[23] a ladder safety mobile application,[24] infographics and tipsheets,[25] toolbox talks,[26] videos and webinars,[27] and safety leadership training.[28] Multi-layered approaches to fall prevention and protection that employ the hierarchy of controls are preferred over single or isolated control measures.

When selecting a roofing company, it is also important to make sure that they follow your city’s codes and permits for roofing work. Shady contractors often do not and will charge your insurance company for things that you do not need or did not ask for simply to maximize your insurance claim and take advantage of vulnerable homeowners.

Mastering the Art of Water Heater Troubleshooting

Water heaters can develop strange smells or discoloration in your water. This can be an indication of a sediment buildup or other issues.

Water Heater

Draining your water heater helps keep it in good condition and can eliminate odors or discoloration. The process is easy and inexpensive. However, if your heater is nearing the end of its life expectancy it may be more cost-effective to replace it. For professional help, contact Water Heater Repair Spring TX.

The thermostat controls the heating elements in your electric water heater. When the thermostat gets faulty it may fail to turn on the upper or lower heating element. This can result in a failure of the heating element and a tripped circuit breaker. If you have a failed thermostat, it is important to replace it quickly before the issue worsens. A professional plumber can easily diagnose and replace your thermostat, getting your water heater back to normal.

To check your thermostat, first make sure it has power by switching off the water heater at your home’s main electrical panel. Then use a screwdriver to remove the access panels for the upper and lower thermostats. If the panels are insulated, pull up and secure the insulation before continuing. Once the access panels are removed, use a digital multimeter to test the thermostat. Connect one of the multimeter’s probes to a thermostat terminal and the other to a wire. If the multimeter reads 1, your thermostat is broken and will need to be replaced.

If the multimeter reads 0 or is showing no continuity, then your thermostat is functioning properly. If you are unsure of how to read the results, consult your multimeter’s instruction manual.

Your thermostat should also show you a dial that indicates the temperature of the hot water in the tank. Ensure that the dial is set to your desired temperature setting. You can also adjust the dial if you want to save money by keeping your water a little warmer or cooler.

A malfunctioning thermostat can cause your water heater to overheat, which is a fire hazard. This can be a serious problem if it happens frequently, and should always be corrected by a professional.

Other common signs of a failing thermostat are that your water isn’t as hot as you like or that it keeps turning off at times when you’re using the water. A tripped circuit breaker is another sign of a malfunctioning thermostat, and should be checked by an electrician. Circuit breakers last a long time, but they do eventually wear out and stop working correctly. When this occurs, it is likely due to corrosion of the aluminum wiring connecting to the breaker.

Anode Rod

A water heater’s sacrificial anode rod takes the place of the tank’s lining and protects the steel interior from corrosion by drawing away the metal ions in the water. The anode rod is a long steel wire with aluminum, magnesium or a zinc-aluminum alloy wrapped around it that screws into the top of the tank. Most water heaters come with an aluminum anode rod, but the type of anode rod you choose should be based on your local water quality.

In most cases, anode rods last about five to six years, and it’s important to replace them regularly. If you don’t, the anode rod will deplete completely and leave your water heater vulnerable to corrosive damage. You can also opt for a powered anode rod, which is a much more expensive option but typically lasts as long as your water heater.

If you’re not sure if the anode rod needs to be replaced, look for signs of wear and tear. These may include a bubbling sound during heating, rust spots on the tank and pooling water underneath the water heater. If you notice any of these symptoms, it’s best to contact a professional to inspect the anode rod and make the necessary repairs.

Anode rods are available in a variety of styles and materials, and the one you select should be based on your home’s water condition and your budget. Aluminum rods are the best choice for hard water, while magnesium is a good option for soft water. If you have smelly water, a zinc-aluminum rod is best because it helps reduce the foul odor caused by sulfur bacteria in the water.

Changing the anode rod is a fairly straightforward job for a technician. The first step is to drain the tank below the anode rod and drain the hex nut holding the rod in place. After that, the technician can unscrew the anode rod from the hex nut and screw in the new rod. Some types of anode rods are flexible, which makes them easy to insert in locations that have limited headspace.

Dip Tube

The dip tube is a long, straight piece of plastic that connects the cold water inlet on the bottom of your gas or electric hot water heater to the top of the tank. It transfers incoming cold water to the bottom of the tank and helps heat it more quickly. If it breaks, you’ll likely notice that your showers are lukewarm or that your home is short of hot water. The dip tube is easily replaced with a kit you can purchase at your local hardware store or big box home improvement center.

Modern dip tubes are usually made from PEX-type plastic and are able to resist corrosion better than older metal ones. They also tend to last longer than their metallic counterparts. But they’re still subject to corrosion, especially if your water is acidic. Over time, the dip tube can disintegrate or break loose at its connection with the inlet port nipple. The resulting fragments of plastic can clog strainers and other points of use and can lead to a shortage of hot water.

When your dip tube is disintegrating, a simple solution is to drain the water heater and replace it. Before you begin, make sure that the circuit breaker that supplies power to your unit is off and that the water supply valve is closed. Then disconnect the cold water supply line and drain the tank to remove any sloughed-off plastic pieces.

Once you’ve drained the tank, you can disconnect the new tube and install it in place of the old one. Before you do, though, be sure to choose a replacement that’s made from durable materials such as cross-linked polyethylene (PEX). It may cost a bit more upfront, but it will withstand the high temperatures inside the water heater and provide a long lifespan.

Push the new tube in all the way until it’s flush with the tank. Then turn on the water heater to refill it and restore power or the gas dial back to its normal operating position. Once the tank is full, turn on a faucet and check for hot water to ensure the new dip tube has been properly installed.

Pressure Valve

The temperature and pressure valve (known as the T&P valve) is one of the most important safety features on your water heater. This is the valve that prevents your water heater from building up excess pressure inside of it, which can cause a tank rupture and possible injury to you or your family.

The T&P valve is a metal or plastic pipe that runs down the length of your water heater tank. It is attached to a discharge tube, which is responsible for routing the hot water that is released from the T&P valve to an appropriate discharge location. The T&P valve will activate when the water temperature or pressure inside of the water heater exceeds safe levels.

It is recommended that you test your T&P valve at least once a year. This will ensure that it is working properly and that it won’t get “stuck”. The best way to test your T&P valve is to lift the lever so that a small amount of water (about a quarter cup) discharges into a bucket. When the lever is released, it should snap back quickly to its original position. If it doesn’t, then your valve may be stuck open and needs to be replaced.

If you aren’t comfortable testing your T&P valve yourself, a plumber can do it for you. To do this, they will need to power down your water heater and drain it before they can test the valve. A plumber will also be able to fix your T&P valve if it is stuck open or closed.

Before you start testing your T&P valve, you should have the following tools on hand: a pipe wrench, a tubing cutter, pliers, a PVC glue gun with a couple of spools of PTFE tape, and a proper replacement valve for your water heater. Before screwing in a new valve, make sure to wrap the threaded end of the discharge tube with PTFE tape in the opposite direction as that of the old tube. Then, screw in the new valve and carefully tighten it. Once it’s securely screwed in, run a strip of PTFE tape over the top of the valve to prevent corrosion.

What You Need to Know About Hot Water Heater Replacement

Water heaters don’t last forever, and it can be expensive to repair a rusted or leaking tank. Often, it’s better to replace the heater.

Water Heater

Working with natural gas, propane, and electricity is dangerous, so this job should be left to a professional plumber. Also, installation requirements vary by location. For professional help, contact Hot Water Heater Replacement Denver.

The anode rod is the unsung hero of tank style water heaters. This sacrificial rod attracts negatively charged electrons away from the steel water heater tank and other exposed metals in the system. It also helps protect the tank lining by lengthening its life. The anode rod is typically made of magnesium or aluminum, which are softer than the steel water heater.

Anode rods should be replaced periodically, depending on your home’s water mineral content, to avoid corroding down to nothing but a piece of scrap metal. Look for signs that the anode rod is wearing out, including a visible bare metal end or rusting down to its core. Sediment build up on the anode rod is another indication that it is time for replacement. If the rod is corroded down to the steel wire, it is already too late and must be replaced immediately.

Your anode rod is usually threaded into the tank, either in a nipple-type opening at the hot water outlet or in a plug-type opening near the top of the tank. Using pipe dope to coat the rod threads can make it easier to remove and replace. You may need to use a socket wrench or a pipe wrench for this job.

Replacing an anode rod is a relatively easy DIY project, but the water heater will need to be drained first for removal and installation. If your water heater manufacturer has a warranty, this should only be done by a licensed plumber as damage to the tank and water line during the process could void the warranty. If you don’t have much headspace above the water heater, consider using a flexible anode rod instead of the traditional magnesium or aluminum. This will help reduce the odor of rotten egg water caused by non-harmful sulfur bacteria.

Dip Tube

The dip tube is the unsung hero of your hot water heater. It transports cold water from the inlet pipe to the bottom of your tank, where it is heated by a burner. Without it, your supply of hot water would be limited or non-existent.

Corrosion eats away at the plastic of the dip tube over time. Constant exposure to water of different temperatures and acidity causes it to erode and shorten its lifespan. Minerals in hard water also impact the dip tube over time. This is why you might see small particles of plastic around your faucets and shower heads. These particles, while resembling dust or soap residue at first glance, actually come from the degraded dip tube.

A functioning dip tube suppresses 8 inches of cold water in the bottom of your tank and pushes it to the center of the tank where a burner heats it. This water then rises to the top where it can be used. When the dip tube is faulty, it lets cold water escape the inlet and mingle with your hot water, which limits your supply and can result in lukewarm showers and washing machines.

Replacing a dip tube is a simple project for homeowners who are not afraid of putting in some elbow grease. The first step is to switch off the power and water supply to your water heater and allow it to cool down. Using a pipe wrench, disconnect the cold water inlet nipple. Then remove the old dip tube and replace it with a new one, being sure to use plumber’s tape to seal off any possible leaks or mishandling in the future.

Thermostat

The thermostat is the part that controls when and how much water is heated. It works with the heating element or burner to raise the water temperature and also tells it when the desired temperature has been reached.

When the thermostat fails, it can lead to overheating and high utility bills as the heating element constantly runs even when no hot water is needed. It is possible to repair a faulty thermostat, however, it is usually more cost effective to replace the unit altogether.

A faulty thermostat can also cause the tank to leak. Leaks can soak and damage belongings as well as create mold when the water reaches living spaces. The thermostat should be tested for proper functioning on a regular basis to ensure it is able to turn the heating element off at the right time.

Older mechanical thermostats use bimetallic strips that expand and bend as the heating element turns on. These devices have a tendency to fail due to wear and tear or corrosion. They should be replaced with a digital thermostat which is more reliable and energy efficient.

Newer electric water heaters have thermostats with digital displays. These are easier to read and offer more accurate temperature settings. They are also programmable, which can help to save on energy costs.

Before attempting to change the thermostat setting, make sure you shut off power to the unit by turning off the circuit breaker. Once the unit is turned off, remove the access panel and plastic safety cover. Unscrew the mounting clip from the thermostat and pry it out of its holding bracket. If the thermostat is displaying a temperature, it can be adjusted by rotating the control dial to a different setting. Any adjustment should be made in small increments to avoid over-heating the unit.

Element

The element is a metal rod that is located at the bottom of the water heater tank. An electric current passes through the element, which causes it to heat up. This heating action is what heats up the water inside the tank. When the element goes bad, your hot water heater will not function properly. This may mean you will run out of hot water more quickly or that the water takes longer to heat up. A bad element can also cause your circuit breaker to trip frequently. If this happens, it is a good idea to consider getting a new water heater.

Failing water heaters can lead to serious health problems, such as bacteria growth in the tap water and carbon monoxide emissions.

Pressure Valve

The pressure valve prevents water from escaping the water heater when it reaches unsafe temperatures and/or pressure levels. It is a safety device that can save your home from a catastrophic water tank burst that could flood your entire house, ruining belongings and creating mold problems. The pressure valve is located on the top or side of the tank, and it includes a plastic or metal discharge tube that points up.

The water pressure inside the tank rises and expands when multiple people use hot showers or tubs simultaneously. The pressure valve ensures that the expansion doesn’t damage your water heater or cause a ruptured tank. The valve is also designed to protect against scalding in your household.

Your home’s water pressure is typically 80 psi (pounds per square inch), but your hot water heater can operate under high or low pressure. The pressure in your water heater depends on the size of the tank, how hot it is set, and the number of showers and tubs you use simultaneously.

In order to maintain the safe pressure in your water heater, you should regularly check and test your pressure valve. The valve is easy to test by opening the valve and observing the amount of water that flows out of the tube. It is recommended that you drain the tank and perform a pressure test twice a year.

If your PRV is leaking or has not opened when the temperature and pressure reach a certain level, it will need to be replaced. It is easy to do, but we recommend letting a professional handle it because it requires shutting off your gas, turning off the water to your water heater, and disconnecting the tank.